
This is tutorial based on the Views Nivo Slider. I gave the credit to mcdazz who helped me to setup views. Nivo Slider is the Most Awesome jQuery Image Slider out integrated with Views and Imagecache modules.
(1) System Requirements (Drupal6 Modules)
- CCK (Content Construction Kit)
- Views
- Views Nivo Slider
- jQuery Update
- Image Cache
- Image API
- Image Field
- File Field
- Link Field
- Token (optional)
(2) Modules Installation
Download all the modules from Drupal Modules and install in the directory yoursitename/sites/all/modules.
Go to administer>site building>modules and enable the modules listed below.
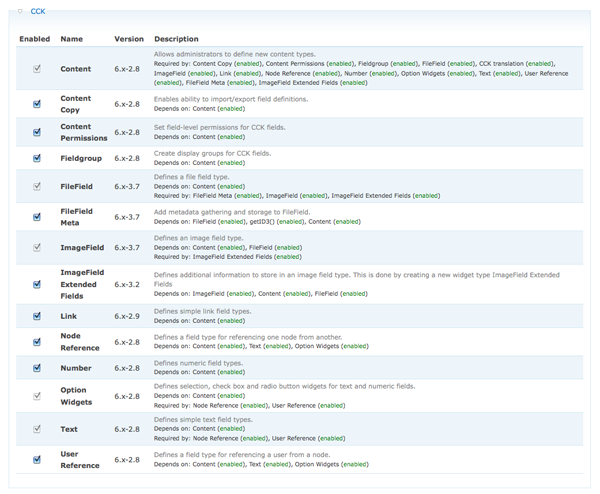
1) On CCK module enable:-Content, Content Copy, Content Permissions, Field Group, File Filed, File Field Meta, Image Field, Image Field Extended Fields, Link, Node Reference, Number, Option Widgets, Text and user Reference.
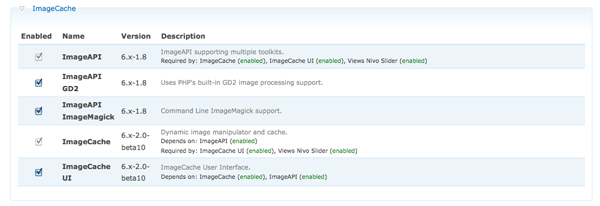
2) On Image Cache module enable:-Image API, Image API GD2, Image API Image Magic, Image Cache and Image Cache UI.
3) On User Interface enable:- jQuery Update.

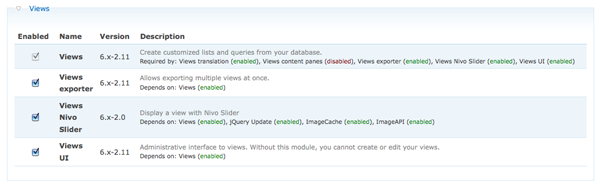
4) On Views Module enable:- Views, Views Exporter, Views Nivo Slider and Views UI.
4) On Token Module enable:- Token (This step is optional but it helps a lot in many situations.)
(3) New Content Type
Now lets create a new content type. administer>Content management>Content types.(You can give any name and can create as many content types as you want).
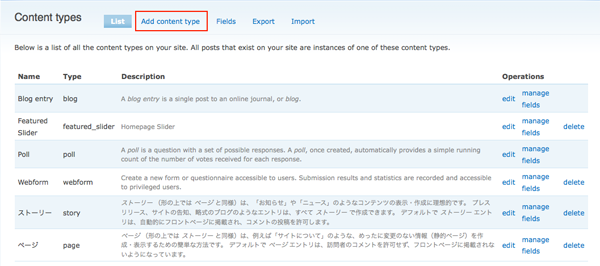
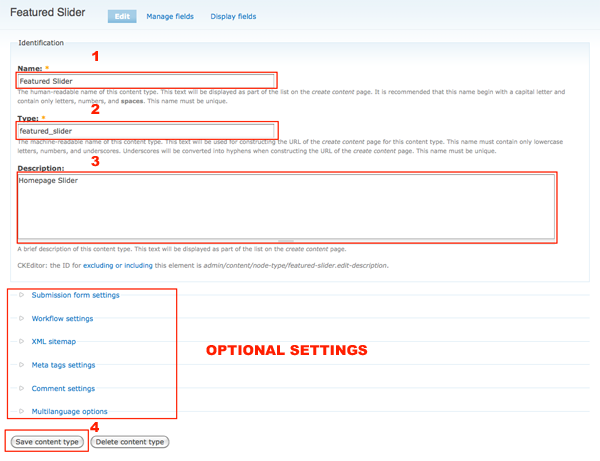
[1] Create a new content type
[2] Give a human-readable name (eg: Featured Slider)
[3] Give a machiene-readable name (eg: featured_slider)
[4] A brief description of this content type. (eg: Home Page Slider)
[5] Save Content Type (Note: If you want you can setup additional Settings here.
Now we have created a new content type name (Featured Slider) next let's add some fields to our new content.
(4) Field Settings
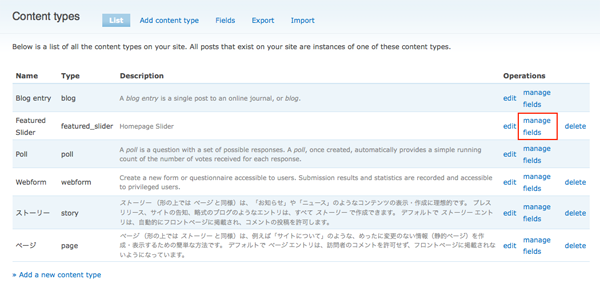
Click on manage Field and add new field as shown below
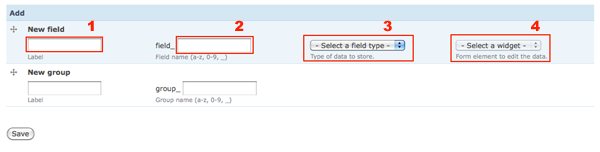
[1] Image Field
New Field> Label: Image, Field Name: field_image, Type of data to store: File, Form element to edit the data: Image.
[2] Link Field
New Field> Label: Link, Field Name: field_link, Type of data to store: Link, Form element to edit the data: Link.
(5) Image Cache Preset Settings
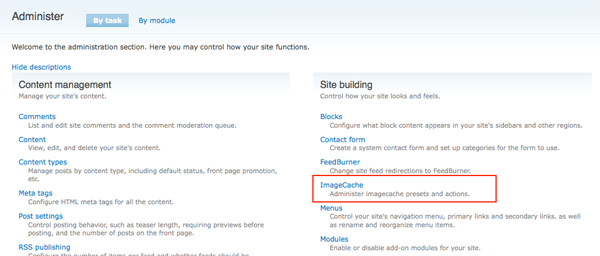
Now let's go and create two image presets. Administer>Site building>ImageCache.
[1] Preset Namespace: Give a machiene readable name (eg: original-image)
[2] Preset Namespace: Give a machiene readable name (eg: thumb-images)

Note: You can resize the image size settings for original and thumb images.
(6) Create Feature Slider Content
I have created four featured slider content for this tutorial.
(1) Click on add content link
(2) Create Featured Slider content
(3) Give a proper title name
(4) Upload slider image
(5) Give alt and title field names
(6) Give a link title and url where you want the slider to be linked
(7) Leave all othe settings as default except for the path field if yo want you can give an SEO friendly URL alias.
(8) Save the content.
Same way create more Featured Slider contents.
(7) View Configurations
Now ler's go and create a new view. Administe>Site building>Views.
If anybody finds it difficult to setup views can dowload this views configuration settings. Copy the data from the text file and go to administer views click import and paste the data on the textarea and click import easy.... DOWNLOAD (.txt format)
-
Click Add.
View name: featured_slider
View description: Slider Views
View tag: Slider
View type: Node
Click Next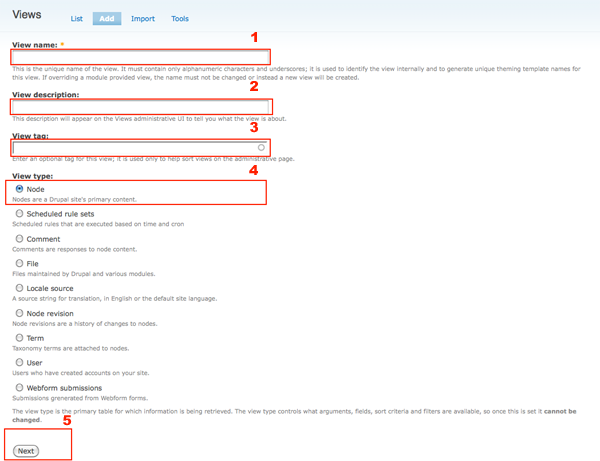
-
AgainCreate new filed by clicking on "+" button next to Fields
From the Groups drop down menu, select Content and then select Content: link
click add then on the next sreen setup as below
Exclude from display: Enabled
Label: None
Link this field to its node: Disabled
Format: URL, as link
Click Update. -
Create new filed by clicking on "+" button next to Fields
From the Groups drop down menu, select Node and then select Node: Title
click add and then on the next screen just delete "Title" from the Label section.
Link this field to its node: Enabled (only if you want title as a link to it's node.)
OR
If you want the image to be linked with the link field you specified then do as below;
Click on the title field and on the title field settings;
Out put this field as link: Enabled and then on the link path copy and paste the link field pattern generated by token below.
Link this field to it's node: Disabled -
Again
Create new filed by clicking on "+" button next to Fields
From the Groups drop down menu, select Content and then select Image (field_image).
click add then on the next sreen setup as below
Label: None
Format: Image
Link this field to its node: Enabled (only if you want the image as a link to it's node)
OR
If you want the image to be linked with the link field you specified then do as below;
Click on the image field and on the image field settings check out put this field as link
and then on the link path copy and paste the link field pattern generated by token below.
make sure the image field is not enabled the Link this field to it's node.
(NOTE: If you want to use the Token Patterns for replacing the link, please keep this order in the fields First link field, then title, then image and so on, because if you kep the link field last then it won't show up as a Token pattern for replacing)
Now lets create filters;
-
Click on "+" button next to Filters
From the Groups drop down menu, select Node, and then select Node: Published.
Click Add. On next sreen Set the following: Published: Yes and Click Update. -
Click on "+" button next to Filters
From the Groups drop down menu, select Node, and then select Node: Type.
Click Add. Set the following:
Operator: Is one of
Node type: Featured Slider
Click Update. -
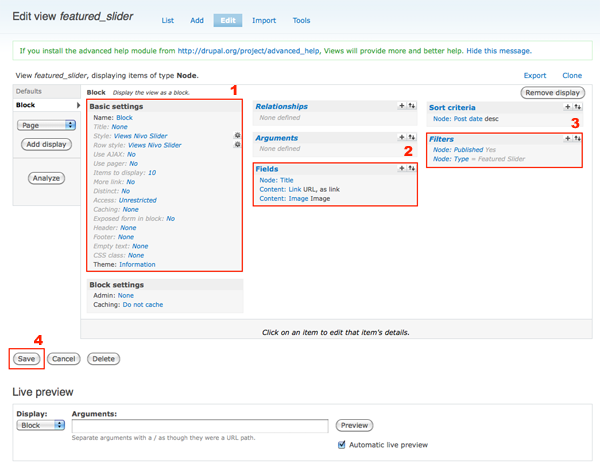
Next we need to set the Style (under Basic settings).
Click on Style and on the sreen below choose Views Nivo Slider.
Click on the Unformatted link (next to Style).
Select Views Nivo Slider from the options.
Click Update.
At the next screen, you can configure the various options for Views Nivo Slider. I set it as default.except for the following:
Image field Preset: original
ImageCache presets for use in thumbs: thumbs
Click Update. -
Next we need to set the Row style .
Click on the Fields link next to Row style.
Select Views Nivo Slider.
Click Update. Set the following options:
Image field: Content: Image (field_image)
Title field: Title
Link field: Content: Link (field_link)
Click Update. and Click Save. -
Next we need to configure the newly created View to show up as a Block. Select Block from the drop down menu (above the Add display button).
Click Add display. and Click Save.
[8] Finally Enable the Block
Now go to Administer>Blocks and you can see a new block has been created by view. Enable the block on to the desired region and create a new featured content. In my case I have created a new region called featured content.

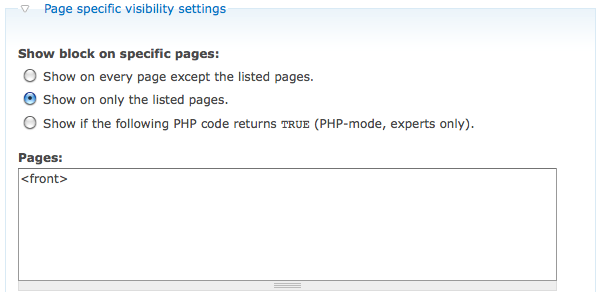
Note: If you want this slider to show on a particular page or front page only, just click on the configure link next to the block and then scroll down till you see page specific visibility settings then select Show on only the listed pages. then type <front> to display this block only in the front page. If you want to display any othere pages just type in the URL of the page. For details read the help text in the configuration section.
You can see a live action on my site. http://www.brightwebsitedesign.com/.
I hope this tutorial was helpful to you. Please write comments and suggessions below.